Wednesday, April 9, 2014

Sunday, March 23, 2014
Tattoos and plant-pot makers
It has been a good weekend so far. I did this yesterday:

Today it looks awful--scabby and red. But it will settle down and be wonderful. The quote is from Mary Oliver's poem "The Summer Day," which you can read here: http://www.loc.gov/poetry/180/133.html
The art is a joint effort between me and my tattoo artist. I wanted a bouquet of rosemary (for remembrance) and sage (for wisdom) but the kind of fine detail necessary would have been a real challenge for the spot on my arm that I wanted the tattoo. We opted instead for a hybrid of the two--grafted them together, if you will--and I love how his drawing came out kind of folk-arty. My husband has taken to calling it a Rage plant. One of the many reasons I love my husband: his sense of humor.
This morning, I did this:
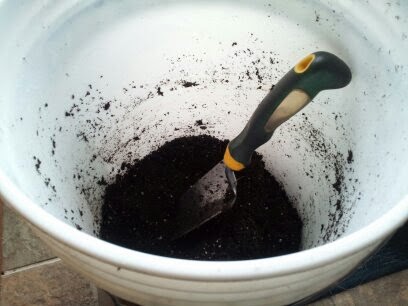

I planted onions and scallions again, along with a first planting of red cabbage, Chinese cabbage, three kinds of kale, parsley, and cilantro.
Seed-starting is definitely an act of hope these days. The weather remains atrocious, with single, taunting lovely days, and then strings of gray and cold ones. We're forecast more snow this coming week. I may just crawl under the grow lights on my seed-starting stand. I could use some consistently sunny and warm(ish) days.
I also played with a new toy today.

It's a plant-pot maker! It makes very tiny seed-starting pots out of newspaper strips. I've made these a little taller, in the hopes that the extra inch at the top will act like a collar when I plant the pots in the ground. The collar can then deter cutworms from taking out my poor seedlings at ground level. I think I'll use these for a few tomato seedlings, and maybe some carrots. They seem ideal for carrots, because carrots resent transplanting. This way, I don't have to disturb them at all--just stick the pot in the ground, and the newspaper will degrade. I might tear some holes in the bottom of the pots, so the carrots can push on through. Not sure yet, as this will be my first year growing them. I might just follow directions, and seed the carrots straight into the ground.
While I wait for this year's growing season to get going, I'm using up the goodies from last year. This week, I used some of my green tomato salsa to make a layered Mexican-style lasagna. Tortillas instead of lasagna noodles, a layer of smooshed black beans and cheese, and a layer of ground beef and spinach, spiced up with chili powder and cumin. Just the kind of gooey-ness the doctor ordered for cloudy skies.
 Here's a link for the salsa: http://www.farmgirlfare.com/2005/09/saving-harvest-green-tomato-relish.html


Today it looks awful--scabby and red. But it will settle down and be wonderful. The quote is from Mary Oliver's poem "The Summer Day," which you can read here: http://www.loc.gov/poetry/180/133.html
The art is a joint effort between me and my tattoo artist. I wanted a bouquet of rosemary (for remembrance) and sage (for wisdom) but the kind of fine detail necessary would have been a real challenge for the spot on my arm that I wanted the tattoo. We opted instead for a hybrid of the two--grafted them together, if you will--and I love how his drawing came out kind of folk-arty. My husband has taken to calling it a Rage plant. One of the many reasons I love my husband: his sense of humor.
This morning, I did this:
I planted onions and scallions again, along with a first planting of red cabbage, Chinese cabbage, three kinds of kale, parsley, and cilantro.

Seed-starting is definitely an act of hope these days. The weather remains atrocious, with single, taunting lovely days, and then strings of gray and cold ones. We're forecast more snow this coming week. I may just crawl under the grow lights on my seed-starting stand. I could use some consistently sunny and warm(ish) days.
I also played with a new toy today.
It's a plant-pot maker! It makes very tiny seed-starting pots out of newspaper strips. I've made these a little taller, in the hopes that the extra inch at the top will act like a collar when I plant the pots in the ground. The collar can then deter cutworms from taking out my poor seedlings at ground level. I think I'll use these for a few tomato seedlings, and maybe some carrots. They seem ideal for carrots, because carrots resent transplanting. This way, I don't have to disturb them at all--just stick the pot in the ground, and the newspaper will degrade. I might tear some holes in the bottom of the pots, so the carrots can push on through. Not sure yet, as this will be my first year growing them. I might just follow directions, and seed the carrots straight into the ground.

While I wait for this year's growing season to get going, I'm using up the goodies from last year. This week, I used some of my green tomato salsa to make a layered Mexican-style lasagna. Tortillas instead of lasagna noodles, a layer of smooshed black beans and cheese, and a layer of ground beef and spinach, spiced up with chili powder and cumin. Just the kind of gooey-ness the doctor ordered for cloudy skies.
Saturday, March 22, 2014
Uh. Hello? Mother Nature?
Memo
To: Mother Nature
From: Christine
Re: Operating System 3.20.2014
While the company recognizes that transitioning from OS
12.20.2013 to OS 3.20.2014 is difficult, it seems that there are some
significant problems that need to be addressed, as soon as possible.
1. While Windows do
not need to be open the entire time from dawn to dusk during the initial
transition, the possibility of keeping Windows open for at least a few hours a
day should exist. As you work out any
bugs with OS 3.20.2014, Windows should be able to be open during all daylight
hours.
2. The lights run by
the computers using OS 3.20.2014 should be much, much stronger, and the heat generated
should be much warmer. The company
figures on at least a consistent 45-55 degrees initially, and then a steady
65-75 degrees by the time we have to transition to OS 6.20.2014.
If you could attend to these details immediately, the
company would be very appreciative.
(Okay, so I know very little about computers, and this is probably riddled with problems. But it was fun, anyway.)
Friday, March 14, 2014
On the surface of things

Looking out the window, it's hard to believe I'll be putting anything in the ground anytime soon. On the surface of things, the world looks--and feels--like we might be entering a new ice age. The wind is whipping around the buildings, sneaking into any uninsulated crevices it can find, and rattling any loose parts. The temperature feels like it's in the teens.

But in a 24-cell tray on the counter, onion seeds are waking up. In another tray, lettuce seedlings have already said their hellos. Spring will indeed be coming. When...well...that's beyond my powers of prediction. The deer hope it will be soon.

This is the first year I'm growing onions, unless you count the six whole scallions I grew last year, as an afterthought. I seeded this year's batch on March 8, after soaking them in a compost tea. It is supposed to help with damping off, which I ran into with some of my pepper seedlings last year. They haven't made their appearance yet, but the spot in the kitchen where they're sleeping is not particularly warm.
The lettuce seeds, however, seem thrilled. They were seeded on March 9, and they're already up. When they're big enough, I'll transplant some into the garden in Massachusetts, and some into pots to keep inside. We should be eating fresh lettuce by the end of April (earlier, if I take baby leaves from the side of the plants).
For now, though, there's a lentil and rice soup simmering on the stove, and we'll keep bundling up in (many) layers to head outside. Except for Shiloh and Montana, who can't figure out why it takes so long to get out the door for a walk.

Tuesday, March 11, 2014
Beginning
March 11, 2014
So.
I'm leaving teaching.
I'm leaving teaching so that I can grow things.
I'm going to grow things, to see if I can feed us.
Growing things, feeding us—feeding others—is, for me, a lot like
teaching. Growing things, feeding others and teaching are all acts of
hope. They are all acts of love. They
all say, "I believe in something bigger than myself, bigger than right
now, bigger than what is. I believe in
what can be." Growing things, feeding
others and teaching all ask us to look at the world in a more benevolent
light. It has always been impossible for
me to look at my eighth graders (even on the days I want to choke them) and not
think, "They will do amazing things."
It has always been equally impossible for me not to lose myself in the
single moments of cooking for others, in the single moments that make up the
whole of a garden. Impossible for me not
to think about the beauty that exists in the ingredients spread out before me,
and the alchemy that happens when they combine.
Kind of like the alchemy that happens when a student is paired with a
just-right book. These moments, when I
stop and pause and think about them, remind me that in spite of what I read in
the paper or see on the news, people are amazing. Life is amazing. And that
gives me hope.
But.
I'm leaving teaching.
I'm leaving teaching, and it is so momentous, it has taken five years
for me to realize that it is necessary, and two to bend my brain around the
fact that it has to happen.
I'm leaving teaching, and it is so momentous, I don't quite have a
fully-formulated answer to, "But what will you do?" I have been a
teacher for 21 years. I once thought
that I would teach until I die.
"'Teacher" is part of my definition of myself.
But.
I can't stay. I can't be part of
what I'm being asked to do to students.
Every fiber of my being is opposed to standardization (in food and
plants, too). Every cell in my body
shrieks as I sit through mind-numbing meeting after mind-numbing meeting about
"data." There are more and
more of these meetings, as we seek to quantify the unquantifiable.
It's not data. They are
kids. They are people, not percentiles.
And I can't do it anymore.
So.
I'm leaving teaching.
I'm leaving teaching so that I can grow things.
Because growing things and teaching are both acts of hopefulness.
I suspect my learning curve will be an almost vertical line. But learning is an act of hopefulness, too.
And though my heart is broken and my brain still doesn't fully
comprehend, I am hopeful.

Wednesday, August 8, 2012
Safe and Sound

It started out as an eggplant and tomato risotto, from The Complete Italian Vegetarian Cookbook by Jack Bishop. And then my husband walked in with our CSA share, and there was a lot more produce staring at me. I'm pretty happy with the way it turned out: creamy and toothy from the rice, a pop of sweetness from the corn, the acidity of the tomatoes, and earthiness from the zucchini and eggplant.
The knives and I think it's a keeper, and my husband agrees.

Late Summer Garden Risotto
serves 6-8
1 ear of corn, kernels cut off, cob broken in half and reserved
5-6 cups of water
1/2 tsp salt
olive oil
1 clove garlic, minced
1/2 red onion, finely chopped
1 cup of rice, Arborio or Carnaroli
1 small eggplant, or 6 Fairy Tale eggplant, chopped
2 small zucchini, chopped
1/4 cup white wine (optional)
2 small to medium tomatoes, seeded over a strainer, liquid pressed into the water above, chopped
salt and pepper to taste
Parmigiano Reggiano cheese, to taste
5 large basil leaves, sliced thinly
5 large mint leaves, sliced thinly
1. Put the corn cob, 1/2 tsp of salt, tomato juice and water in a small saucepan. Bring to a boil, reduce heat to simmer.
2. Heat olive oil in a large skillet over medium. Add garlic and onion, and cook gently until softened, about 4 minutes. Add rice; stir to coat with oil. Add eggplant and zucchini, stir to coat with oil. Cook about 5 minutes. Add wine if using; cook, stirring, until mostly absorbed.
3. Add 1 cup of the corn cob liquid to the rice mixture. Cook, stirring occasionally, until the liquid is absorbed. Keep adding liquid by the 1/2 or 1 cupful, stirring occasionally, until the rice is almost al dente (this will take about 15 to 18 minutes). Don't use all of the liquid--use about 3 1/2 to 4 cups. Add about 1/2-3/4 tsp of salt and black pepper.
4. Add the corn kernels and tomatoes. Add 1/2 cup liquid, stir til absorbed. At this point, keep tasting the rice. You don't want it to get mushy. Keep adding liquid until the rice is the consistency you want it, creamy but "toothy."
5. Stir in the cheese; taste, and add additional salt if desired. Stir in the herbs, and serve immediately.

Thursday, August 2, 2012
Almost a meal

I was toying with the idea of turning a smoothie into "food." What could I add that would make one more substantial? Then I was thinking about muesli, and how if you soak oatmeal in milk it doesn't have to be cooked because it softens on its own. The next thought was, "Well, yogurt is milk. And it feels a little more substantial." Blueberries were the fruit in the fridge, and voila: a blueberry-oatmeal smoothie. It's a little sweet from the honey, a little tart from the blueberries and yogurt, and a little nutty from the oatmeal and walnuts. There's also a texture to it from those last two.
Blueberry-Oatmeal Smoothie
serves 1
3/4 cup Greek yogurt (I used plain)
1 to 2 tbsp oatmeal, uncooked
1/2 cup blueberries, washed, water still clinging a little
1 to 2 tsp honey
1/4 tsp cinnamon
2 tbsp milk
2 tbsp to 1/4 c walnuts
ice cubes (optional)
Add the yogurt and oatmeal to the blender. Let them sit for a few minutes, so the oatmeal begins to soften. (You could do this overnight.) Add the rest of your ingredients and blend until as smooth as you can get it.
Thursday, July 26, 2012
No Blah Here

Hahahahahaha!
As if.
It is really pretty, though, and it couldn't be any easier or more customizable. The basics: chop the stems of rainbow chard into 1/4 inch slices, and chop or tear the leaves into bite-sized pieces. Place the chard stems in the bottom of a colander, put the leaves on top. Boil a cup (or more) of orzo--I used whole wheat. When the orzo is done, pour it over the chard. Drain really well, and then mix in what you want. This salad has sliced zucchini and radishes, shredded yellow squash, diced tomatoes, and basil. Add the cheese of your choice (this one has feta), and the dressing of your choice (I'm partial to a red wine vinaigrette), stir, and either eat right away, or chill and serve cold.
Normally, I find pasta salads either overdressed, really boring, or both. But there's no blah here, and doesn't have to be because you can change up what goes in each time. Hooray!
Wednesday, July 18, 2012
Twee Tasty Tartlets


My first thought when I saw the recipe was, "Ugh. Fussy." But they weren't. Here are my tips:
1. Get yourself a tart tamper. It will make putting the dough in the mini-muffin tin a heck of a lot easier. I was singing my sister-in-law's praises for recommending this little beauty.
2. Don't be tempted to overfill the tart cups. You'll have blueberry lava flowing and merging all over the tin. (If, like me, you can't resist, make sure you start smoothing the lava back into each cup shortly after you pull them out of the oven. Also, start carefully loosening the tarts as soon as you've re-sorted the lava. And clean the tin as soon as you have the tarts safely on the cooling rack. Once that blueberry stuff cools, it takes a jackhammer to remove. I've done it both ways, and prefer the non-jackhammer way.)
3. After you fill the cups, pop them back in the fridge for a while, even though the recipe doesn't call for it. Especially if it's a 90 degree day, as it is here.
3. Make sure your mini-muffin pan is really, really non-stick. Life will be easier.
4. If some of the tartlets resist coming out of the pan, eat the evidence. Heck, there are 24 of them. Who's going to miss one? Or, um, two.

Here's the link. Enjoy!
http://www.marthastewart.com/275045/blueberry-recipes/@center/276955/seasonal-produce-recipe-guide#/254674
Friday, July 13, 2012
Delicious Experimentation

The town we live in is just south of Boston, Massachusetts. We have a wealth of restaurants in Boston, of course, but our town is no slouch, either. You can get great Vietnamese at Pho Hua, great fried seafood at Tony's on the beach, tasty "modern comfort food" at Remick's, and AWESOME nachos at the Fat Cat.
The nachos in question are Roasted Garlic-Pulled Pork nachos. In the interest of full disclosure, I will admit that when I'm having an especially bad day, I have been known to eat the entire plate (minus a few naked chips) by myself. I'm sure it's only about 7,000 calories and 920 grams of fat. Fortunately, I don't have those kinds of bad days too often...! Usually, I'm willing, nay, I prefer, to share.

Roasted Garlic and Pulled Pork Nachos
idea taken from the Fat Cat Restaurant
Roasted Pulled Pork and Roasted Garlic
one 4-5 pound bone-in pork shoulder roast, with fat left on
salt and pepper
2 bulbs garlic
Preheat oven to 425.
1. Score the fat on the pork in a diamond pattern, making sure not to cut into the meat. Rub about 1 tsp salt into the cuts. Salt and pepper the other sides, to taste. (see Jamie Oliver for an amazing recipe for this)
2. Put the meat fat side up on a rack in a roasting pan (I used a cooling rack inside a jelly-roll pan, because I left my roaster in NY.). Bake for 30 minutes, or until the fat starts to get crispy (crackling!).
3. Cover the meat tightly with foil, lower the heat to 325, and roast for 3-5 hours (depending on the size of your roast) or until the meat is shrinking from the bone and pulls apart with two forks. Remove the foil for the last 1/2 hour so the crackling crisps up again. If you want to eat it. If not, don't bother.
4. One and a half hours before the pork is done, cut the top off of the garlic bulbs, so that all garlic cloves are showing. Place each on its own square of heavy-duty foil, drizzle each with about 2 tsp olive oil, wrap tightly, and roast in the oven until soft.
5. Remove pork and garlic from oven. Shred two or so cups of the pork to use for the nachos, and enjoy the rest for dinner! Or, well, maybe a few dinners...
Nachos
(serves 4...or in our house, two for dinner)
2 cups shredded pork
1 cup barbecue sauce of your choice, divided (a balanced sweet-tangy is best here)
roasted garlic, cloves squeeze out of the papery husk (use as many of the cloves as you want--I used a little more than half of a bulb; the restaurant definitely uses more)
1 cup cooked corn (frozen is fine here)
two to three handfuls of tortilla chips per person
4-6 oz shredded smoked mozzarella or smoked cheddar (or a mix)
pickled jalapenos (optional)
Corn and tomato salsa (see below)
plain Greek yogurt or sour cream for serving (optional)
Preheat oven to 325.
1. In a medium saucepan, heat the pork, 3/4 cup barbecue sauce, and garlic over low heat until warm. Add corn, cook until warm.
2. Scatter the tortilla chips on a jelly roll pan. Evenly distribute the pork over the chips, drizzle over remaining barbecue sauce, sprinkle with jalapenos (if using) and evenly sprinkle cheese over all. Bake on middle rack of oven for 20 minutes, or until the cheese is melted and edges of chips are just starting to brown.
3. Remove the nachos from the oven. Evenly distribute the corn and tomato salsa, leaving the juices behind, over the nachos. Return to the oven on the top rack, and bake until the tomatoes start to soften and the chips are browned at the edges, 7-10 minutes. Serve with yogurt or sour cream, if desired.
Corn and tomato salsa
1 cup cooked corn* (fresh is better here, but frozen-quick cook it and drain it well-is fine)
1 cup chopped tomato
1 tbsp shredded basil
salt, to taste
Mix all ingredients to combine.
*If your corn is fresh, you could pan roast it or grill it to add a slight layer of smoky flavor.

Monday, March 26, 2012
Just a quickie
No photos today, just a recipe I wanted to share (and write down somewhere that I could find it again.) This chili is vindication for the hours spent "putting by" last summer. The zucchini, peppers, tomatoes and corn were all from my stash. Woohoo!
Vegetarian Quinoa Chili
(Vegan, if you skip the cheese and yogurt garnishes)
1/2 cup quinoa, well rinsed and drained
1 cup of water
pinch of salt
1 tbsp canola oil
1 1/2 c chopped onion
2 garlic cloves, minced
2 cups shredded zucchini (I pulled mine out of the freezer; fresh would work great, too.)
1 tsp salt (or to taste--maybe start with 1/2 and build from there)
1/2 tsp ground coriander
1 1/2 tsp cumin
1 1/2 tsp regular chili powder
1/2 tsp Chipotle chili powder (or another 1/2 tsp regular, instead, if you don't want the heat)
1 cup chopped roasted red pepper
1/2 cup chopped roasted poblano pepper (could use fresh versions of both peppers; if you do, add them with the onion and garlic so they can soften)
1 can kidney beans, rinsed and drained
1 can black beans, rinsed and drained
2 cups tomatoes (mine was puree from summer canning; use what you like, but use the juices, too)
1-1 1/2 cups frozen corn
juice of 1/2 a lemon (lime would be great too, but I had lemon)
Garnishes: (all optional)
diced avocado
shredded Pepper Jack cheese
Greek yogurt
fresh lemon juice
1. In a small saucepan, bring the quinoa, water, and pinch of salt to a boil. Lower the heat, cover, and simmer for 15-20 minutes, or until water is just absorbed. Remove from heat. Leave lid on so quinoa can "steam" until you're ready for it.
2. In a Dutch oven, bring the oil to medium temperature. Add the onion and garlic and cook, stirring often, until they begin to soften, about five minutes. Add the zucchini. If using frozen, you'll want to cook off most of the water it releases before adding the rest of the ingredients.
3. Add salt through chili powders, and cook, stirring, for one to two minutes, or until the spices have mixed in well and look a bit like a paste. Add the peppers, beans, and tomatoes. Bring to a boil, reduce the heat to a simmer, and cook five minutes. Add the corn. Cook just until heated through.
4. Add the lemon juice and quinoa. Stir to mix completely. Taste, and adjust seasonings/spices to your liking. Top with any desired garnishes.
Vegetarian Quinoa Chili
(Vegan, if you skip the cheese and yogurt garnishes)
1/2 cup quinoa, well rinsed and drained
1 cup of water
pinch of salt
1 tbsp canola oil
1 1/2 c chopped onion
2 garlic cloves, minced
2 cups shredded zucchini (I pulled mine out of the freezer; fresh would work great, too.)
1 tsp salt (or to taste--maybe start with 1/2 and build from there)
1/2 tsp ground coriander
1 1/2 tsp cumin
1 1/2 tsp regular chili powder
1/2 tsp Chipotle chili powder (or another 1/2 tsp regular, instead, if you don't want the heat)
1 cup chopped roasted red pepper
1/2 cup chopped roasted poblano pepper (could use fresh versions of both peppers; if you do, add them with the onion and garlic so they can soften)
1 can kidney beans, rinsed and drained
1 can black beans, rinsed and drained
2 cups tomatoes (mine was puree from summer canning; use what you like, but use the juices, too)
1-1 1/2 cups frozen corn
juice of 1/2 a lemon (lime would be great too, but I had lemon)
Garnishes: (all optional)
diced avocado
shredded Pepper Jack cheese
Greek yogurt
fresh lemon juice
1. In a small saucepan, bring the quinoa, water, and pinch of salt to a boil. Lower the heat, cover, and simmer for 15-20 minutes, or until water is just absorbed. Remove from heat. Leave lid on so quinoa can "steam" until you're ready for it.
2. In a Dutch oven, bring the oil to medium temperature. Add the onion and garlic and cook, stirring often, until they begin to soften, about five minutes. Add the zucchini. If using frozen, you'll want to cook off most of the water it releases before adding the rest of the ingredients.
3. Add salt through chili powders, and cook, stirring, for one to two minutes, or until the spices have mixed in well and look a bit like a paste. Add the peppers, beans, and tomatoes. Bring to a boil, reduce the heat to a simmer, and cook five minutes. Add the corn. Cook just until heated through.
4. Add the lemon juice and quinoa. Stir to mix completely. Taste, and adjust seasonings/spices to your liking. Top with any desired garnishes.
Sunday, March 25, 2012
Spring Chill
Sometimes, I hate it when I'm right. Temperatures dropped this weekend; it's not wintry or anything, but it's a challenge after the sheer bliss of earlier in the week. What to do, what to do?
Make soup.

Make-Way for Spring Minestrone w/ Ricotta-Honey Toasts
serves 4-6
2 tbsp olive oil
1 cup chopped onion
1 large stalk celery, chopped
1/4 cup chopped carrot
1 tbsp minced garlic
salt and pepper to taste
1 cup diced, peeled turnips
1/2-1 cup diced, peeled parsnip (sometimes I find parsnip an overwhelming flavor, so I go light)
2 bay leaves
3-5 sprigs thyme
2 tbsp chopped parsley
4 cups shredded cabbage (I used green)
1-1 1/2 cups peeled carrots, sliced into 1/4 inch coins
4-6 cups chicken or vegetable broth, water, or a mix
1 cup rinsed and drained cannelini beans
1 rind parmigiano reggiano cheese (optional, unless you live here)
1 cup chopped frozen green beans (not thawed)
1. In a Dutch oven, warm the olive oil over medium-low heat. Add the onion, celery, 1/4 c chopped carrot, garlic, and a pinch of salt and pepper. Cook, stirring occasionally, until the vegetables begin to soften.
2. Add the turnips, parsnips, bay, thyme, and parsley. Cook about 5 minutes, stirring occasionally.
3. Add the cabbage and carrot coins. Stir to coat with the oil, and add 4 cups of the liquid. Bring to a boil, reduced the heat, add the cannelini beans and cheese rind, and let simmer 10 minutes. (Before adding the beans, check the level of liquid; if you'd like it "soupier" add the rest of broth. I did.) Taste, and add salt and pepper to your liking.
4. Just before turning off the heat, add the frozen green beans. Cook for about 2-3 minutes. Serve immediately, with Ricotta-Honey Toasts.
Ricotta-Honey Toasts
make as many as you want :)
1/2" thick slices of a country-style or Italian bread, lightly toasted
ricotta cheese (1 tbsp per toast slice)
freshly grated black pepper
honey, for drizzling
Spread ricotta on toast slices. Warm in the oven or toaster oven (I used the "light" toast setting on my toaster oven). Grind black pepper over the ricotta cheese (I go about medium-heavy with this) and then drizzle honey over top. Serve warm.
Make soup.

Make-Way for Spring Minestrone w/ Ricotta-Honey Toasts
serves 4-6
2 tbsp olive oil
1 cup chopped onion
1 large stalk celery, chopped
1/4 cup chopped carrot
1 tbsp minced garlic
salt and pepper to taste
1 cup diced, peeled turnips
1/2-1 cup diced, peeled parsnip (sometimes I find parsnip an overwhelming flavor, so I go light)
2 bay leaves
3-5 sprigs thyme
2 tbsp chopped parsley
4 cups shredded cabbage (I used green)
1-1 1/2 cups peeled carrots, sliced into 1/4 inch coins
4-6 cups chicken or vegetable broth, water, or a mix
1 cup rinsed and drained cannelini beans
1 rind parmigiano reggiano cheese (optional, unless you live here)
1 cup chopped frozen green beans (not thawed)
1. In a Dutch oven, warm the olive oil over medium-low heat. Add the onion, celery, 1/4 c chopped carrot, garlic, and a pinch of salt and pepper. Cook, stirring occasionally, until the vegetables begin to soften.
2. Add the turnips, parsnips, bay, thyme, and parsley. Cook about 5 minutes, stirring occasionally.
3. Add the cabbage and carrot coins. Stir to coat with the oil, and add 4 cups of the liquid. Bring to a boil, reduced the heat, add the cannelini beans and cheese rind, and let simmer 10 minutes. (Before adding the beans, check the level of liquid; if you'd like it "soupier" add the rest of broth. I did.) Taste, and add salt and pepper to your liking.
4. Just before turning off the heat, add the frozen green beans. Cook for about 2-3 minutes. Serve immediately, with Ricotta-Honey Toasts.
Ricotta-Honey Toasts
make as many as you want :)
1/2" thick slices of a country-style or Italian bread, lightly toasted
ricotta cheese (1 tbsp per toast slice)
freshly grated black pepper
honey, for drizzling
Spread ricotta on toast slices. Warm in the oven or toaster oven (I used the "light" toast setting on my toaster oven). Grind black pepper over the ricotta cheese (I go about medium-heavy with this) and then drizzle honey over top. Serve warm.
Friday, March 23, 2012
Dinner a Deux
...on the deck. In March! For the second time this week!

We actually could have eaten on the deck four out of the five evenings this week, but two of them I was just too tired and cranky to cook. Standardized testing often does that to teachers (and their students). But enough of that nonsense, because mostly, this has been a great week. Temperatures have been at least in the 70's this week, and nights have been in the 50's. I know it won't last throughout March, or, well, it shouldn't last throughout March, so I've been spending as much time outside as possible.
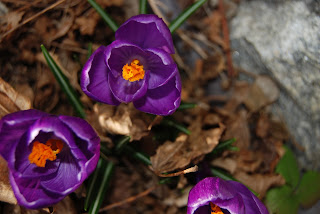
There are many things popping their adorable heads up all over the garden. The sorrel is probably a week away from being able to start (sparingly) harvest it, chives are gangbusters, and mint, marjoram, and oregano and their ruffly little selves are appearing everywhere. Because that's what they do, which is a whole 'nother story.
A few heads of escarole over-wintered, along with some collards and two kinds of kale. The Blue Vates Kale that I harvested last December by cutting them at the stalk near the soil line are leafing out again. (Sometimes it pays to be lazy and not pull stalks.) The greens are all still too small to pick, but they're on their way.
I've planted peas and fava beans--the favas are new this spring, so I'm keeping my proverbial fingers crossed, because I LOVE fava beans. If they're a success, I'll be a happy gal. In the kitchen window, I've started more collards, broccoli rabe, spinach, basil, tomatoes, and ground cherries--they're new this year, too. I've planted zucchini seeds, but they're still hibernating. Or, perhaps, I am going to add another year to my seemingly complete inability to grow the little stinkers. For now, I choose to go with hibernating.
With all this green stuff everywhere, I was craving a spring risotto. I pulled the last sad leeks from the refrigerator, dug out some frozen peas, snipped some chives and mint, crisped some prosciutto, and yum.

I used to be afraid of risotto, along with yeast breads and pie crusts. But unlike motorcycles, you can eat these things, so they're fears I wanted to conquer. I'm still not always brilliant at bread, but I'm really comfortable with the other two these days. And risotto is worth getting comfortable with, because that creamy deliciousness, achieved without using cream, is wonderful. A spring risotto, in my head, anyway, is a cross between earthy and green. The leeks gave me earthy, the peas gave me a cross between the two, and the mint and chives provided the straight-up green. I added a little lemon zest at the end, and it perked things right up. Served with some grilled shrimp doused in lemon juice, dinner was the perfect blend of spring's green and its lightness.
Pea, Leek, and Prosciutto Risotto
serves 4
1 tbsp olive oil
2 small leeks, white and light green parts only, sliced into half moons and well-washed
1 cup risotto rice (I used Carnaroli, because it's what I had)
1/4 c dry white wine or dry vermouth
3-4 cups chicken broth, vegetable broth, or even water (I had 3 cups in the fridge, and added 1 c water)
salt and pepper to taste
3/4-1 cup frozen peas, not defrosted
1 tbsp + 2 tsp chopped fresh chives
1 tbsp chopped fresh mint
1/4-1/2 cup grated parmigiano reggiano**
zest of a lemon
crispy prosciutto, optional*
1. Bring the broth/water to a simmer. Keep warm.
2. Heat the olive oil in a medium skillet over medium heat. Add the leek and a small pinch of salt. Cook, stirring often, until very soft. Reduce the heat if browning too quickly. Stir in the rice, and cook, stirring, until the outer edges of the rice grains begin to look somewhat translucent. Add the wine or vermouth, and cook, stirring, until most of the liquid is absorbed.
3. Add one cup of the warm liquid to the rice. Cook, stirring occasionally, until most of the liquid is absorbed, but the pan still looks a little "creamy." Add another cup of the liquid, and repeat. At this point, I begin adding the liquid in half-cup increments; tonight's risotto used just over 3 cups of the liquid to reach the creamy-but-with-a-hint-of-a-bite I like in my risotto. This whole process should take less than 20 minutes. Have a tasting spoon so you can start checking for done-ness after your third cup of liquid. As the risotto begins approaching your preferred consistency, add the peas and 1 tbsp of chives, and stir through.
4. When the risotto consistency is where you like it, turn off the heat and stir in the 2 tsp chives, the mint, the cheese, and the lemon zest. Crumble over the crispy prosciutto, if using. Taste and adjust for salt and pepper, and serve immediately.
Crispy Prosciutto
3 slices prosciutto
Heat your oven or toaster oven to 350. Make a "nest" or mound of each piece of prosciutto on a baking sheet, and bake until crispy, anywhere from 7-15 minutes. Keep an eye on it, as it can go quickly as it gets near its state of perfect crispness.
*Leave off the prosciutto and use vegetable broth, and the risotto is vegetarian.
**Also leave out the parmigiano reggiano to delight the vegans in your life.

We actually could have eaten on the deck four out of the five evenings this week, but two of them I was just too tired and cranky to cook. Standardized testing often does that to teachers (and their students). But enough of that nonsense, because mostly, this has been a great week. Temperatures have been at least in the 70's this week, and nights have been in the 50's. I know it won't last throughout March, or, well, it shouldn't last throughout March, so I've been spending as much time outside as possible.

There are many things popping their adorable heads up all over the garden. The sorrel is probably a week away from being able to start (sparingly) harvest it, chives are gangbusters, and mint, marjoram, and oregano and their ruffly little selves are appearing everywhere. Because that's what they do, which is a whole 'nother story.
A few heads of escarole over-wintered, along with some collards and two kinds of kale. The Blue Vates Kale that I harvested last December by cutting them at the stalk near the soil line are leafing out again. (Sometimes it pays to be lazy and not pull stalks.) The greens are all still too small to pick, but they're on their way.
I've planted peas and fava beans--the favas are new this spring, so I'm keeping my proverbial fingers crossed, because I LOVE fava beans. If they're a success, I'll be a happy gal. In the kitchen window, I've started more collards, broccoli rabe, spinach, basil, tomatoes, and ground cherries--they're new this year, too. I've planted zucchini seeds, but they're still hibernating. Or, perhaps, I am going to add another year to my seemingly complete inability to grow the little stinkers. For now, I choose to go with hibernating.
With all this green stuff everywhere, I was craving a spring risotto. I pulled the last sad leeks from the refrigerator, dug out some frozen peas, snipped some chives and mint, crisped some prosciutto, and yum.

I used to be afraid of risotto, along with yeast breads and pie crusts. But unlike motorcycles, you can eat these things, so they're fears I wanted to conquer. I'm still not always brilliant at bread, but I'm really comfortable with the other two these days. And risotto is worth getting comfortable with, because that creamy deliciousness, achieved without using cream, is wonderful. A spring risotto, in my head, anyway, is a cross between earthy and green. The leeks gave me earthy, the peas gave me a cross between the two, and the mint and chives provided the straight-up green. I added a little lemon zest at the end, and it perked things right up. Served with some grilled shrimp doused in lemon juice, dinner was the perfect blend of spring's green and its lightness.
Pea, Leek, and Prosciutto Risotto
serves 4
1 tbsp olive oil
2 small leeks, white and light green parts only, sliced into half moons and well-washed
1 cup risotto rice (I used Carnaroli, because it's what I had)
1/4 c dry white wine or dry vermouth
3-4 cups chicken broth, vegetable broth, or even water (I had 3 cups in the fridge, and added 1 c water)
salt and pepper to taste
3/4-1 cup frozen peas, not defrosted
1 tbsp + 2 tsp chopped fresh chives
1 tbsp chopped fresh mint
1/4-1/2 cup grated parmigiano reggiano**
zest of a lemon
crispy prosciutto, optional*
1. Bring the broth/water to a simmer. Keep warm.
2. Heat the olive oil in a medium skillet over medium heat. Add the leek and a small pinch of salt. Cook, stirring often, until very soft. Reduce the heat if browning too quickly. Stir in the rice, and cook, stirring, until the outer edges of the rice grains begin to look somewhat translucent. Add the wine or vermouth, and cook, stirring, until most of the liquid is absorbed.
3. Add one cup of the warm liquid to the rice. Cook, stirring occasionally, until most of the liquid is absorbed, but the pan still looks a little "creamy." Add another cup of the liquid, and repeat. At this point, I begin adding the liquid in half-cup increments; tonight's risotto used just over 3 cups of the liquid to reach the creamy-but-with-a-hint-of-a-bite I like in my risotto. This whole process should take less than 20 minutes. Have a tasting spoon so you can start checking for done-ness after your third cup of liquid. As the risotto begins approaching your preferred consistency, add the peas and 1 tbsp of chives, and stir through.
4. When the risotto consistency is where you like it, turn off the heat and stir in the 2 tsp chives, the mint, the cheese, and the lemon zest. Crumble over the crispy prosciutto, if using. Taste and adjust for salt and pepper, and serve immediately.
Crispy Prosciutto
3 slices prosciutto
Heat your oven or toaster oven to 350. Make a "nest" or mound of each piece of prosciutto on a baking sheet, and bake until crispy, anywhere from 7-15 minutes. Keep an eye on it, as it can go quickly as it gets near its state of perfect crispness.
*Leave off the prosciutto and use vegetable broth, and the risotto is vegetarian.
**Also leave out the parmigiano reggiano to delight the vegans in your life.
Monday, March 12, 2012
It's not an insult

In this house, the word "tart" is thrown around lovingly. I'm not sure when I became so enamored of these glorious concoctions, but I can't get enough of them. Sweet and savory, breakfast, lunch, and dinner, tarts are in the rotation.
This weekend, I made three: a roasted red pepper and prosciutto tart from a Fine Cooking magazine issue a few years back, an Artichoke Polenta Tart from Maria Speck's book, Ancient Grains for Modern Meals, and a Rocky Road Tart from Martha Stewart.

I was grumbling to Larry on Saturday about how time consuming the red pepper tart is, but after having it for lunch today, I'm kicking those grumbles to the curb; this tart is worth every second!

Here's the Martha Stewart recipe:
http://www.marthastewart.com/314986/rocky-road-tart
I'll get back to you on the Artichoke and Polenta Tart--we loved it, but I want to make it and actually follow the recipe before I say anything else. My main concern: I didn't have the correctly sized tart pan, which I think made a difference.
Oh darn. I'll have to go shopping. And make the tart again. Poor me.
Wednesday, March 7, 2012
Are those angels singing?

Don't worry. The hyperbole only lasts until I've been warm for a while.
(Waiting for food? Scroll on down!)
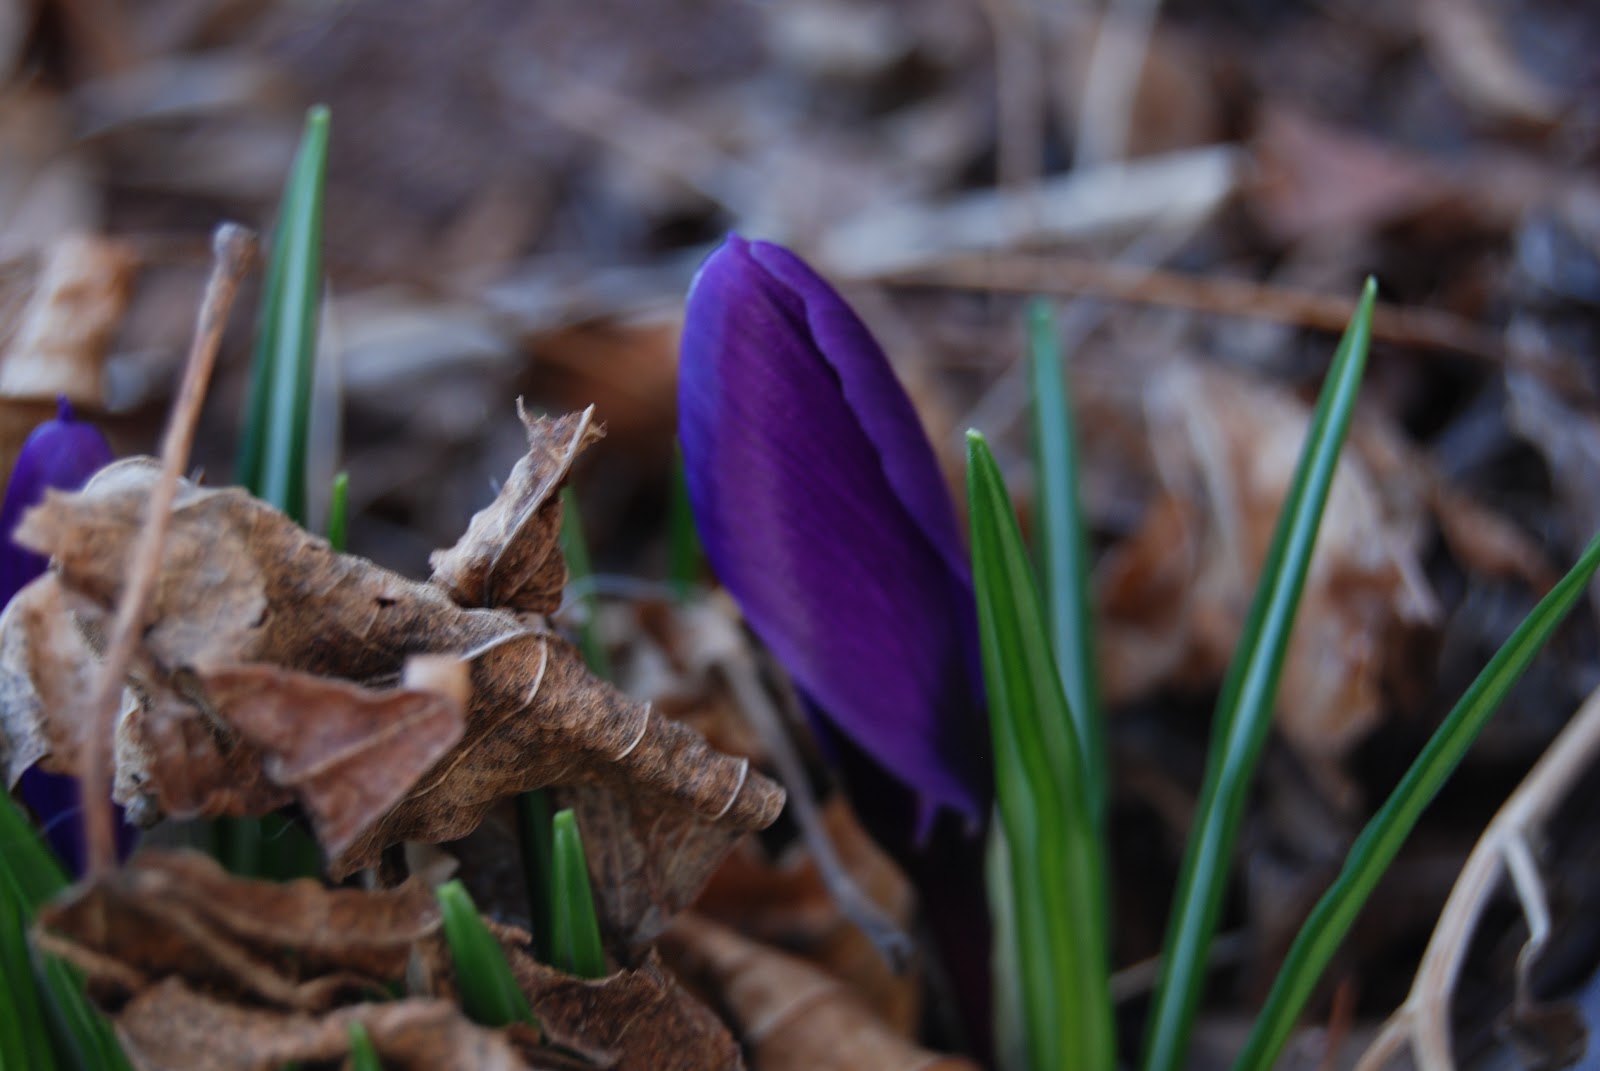

Hello, little leaflings. Welcome to spring.

We'll be eating sorrel again soon! Very excited, since I have a new sorrel tart I want to try.


The recipe calls for a garlic-yogurt sauce, which I also made. I liked the quinoa with and without the yogurt, but Larry definitely preferred it with the yogurt stirred through. We had it as our main dish, but it would make a great side dish; it's also good warm, room-temp, and cool.
Cumin-Scented Quinoa with Beets
from Ancient Grains for Modern Meals by Maria Speck
Quinoa
1 tbsp extra virgin olive oil
1 tsp whole cumin seeds
1 cup quinoa, (yellow if using yellow beets, red for red beets) well rinsed and drained
1 3/4 cups water
3/4 tsp fine sea salt
1/2 tsp sumac
Sumac and Yogurt Topping, and to Finish
1 cup plain yogurt
1 clove garlic, very finely minced
1/2 tsp sumac or 1 tsp fresh lemon juice
1 1/4 cups peeled, shredded raw beet (I also added a carrot)
1 to 2 tbsp fresh lemon juice
1 or 2 pinches cayenne pepper
1. Heat the olive oil in a medium saucepan over medium heat until the oil shimmers. Add the cumin seeds and cook, stirring, until the seeds darken and become fragrant, about 30 seconds. Stir in the quinoa (Speck warns it may splatter, and she is correct) and cook, stirring, until hot to the touch, about one minute. Add the water, salt, sumac and bring to a boil. Decrease the temperature to maintain a simmer, cover, and cook until the liquid is absorbed, about 15-20 minutes.
2. Make the sumac-yogurt topping. Beat the yogurt and garlic in a small bowl with a fork until smooth. Sprinkle with sumac and set aside (I mixed the sumac in).
3. To finish, remove the saucepan from the heat. Stir in the shredded beet, cover, and steam for 3 to 5 minutes. Stir in 1 tbsp lemon juice and the cayenne. Taste for seasoning, and serve with the yogurt topping.
Subscribe to:
Posts (Atom)